Soil Testing for Cannabis: A Complete Guide to Maximizing Yield and Quality

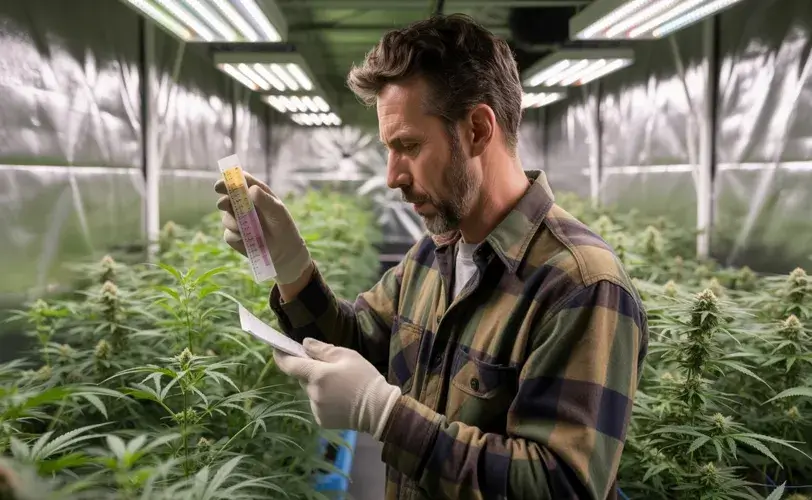
Soil testing for cannabis is a critical step for growers who want to optimize plant health, boost cannabinoid production, and achieve maximum yields. Whether you are a hobbyist grower with a few plants or a commercial cultivator running acres of production, understanding what is in your soil—and what it lacks—can mean the difference between a mediocre harvest and top-shelf flower.
This comprehensive guide explains everything you need to know about soil testing for cannabis. We will cover why it matters, how to perform a soil test, what to look for in the results, and how to amend your soil accordingly. You’ll also learn about the most important macronutrients and micronutrients for cannabis, how soil pH impacts plant health, and which testing methods are best for various grow styles.
Why Soil Testing Matters for Cannabis
Cannabis plants are highly sensitive to their growing environment. While they can survive in a variety of conditions, optimal growth only occurs when nutrient availability, pH balance, microbial activity, and soil texture are all dialed in. Without a soil test, growers are left guessing, relying on intuition or trial and error, which often leads to nutrient lockouts, deficiencies, or toxicities.
Soil testing provides growers with data. This data allows for precision growing, enabling better control of nutrient levels, adjustments in pH, and targeted amendments that enhance microbial life and root development. With proper soil testing, cannabis cultivators can:
-
Prevent over- or under-fertilizing
-
Adjust pH to ideal ranges (typically 6.0 to 6.8)
-
Optimize nutrient uptake
-
Reduce waste and save money
-
Improve overall plant vigor, yield, and terpene profile
The Essential Elements in Cannabis Soil
A proper soil test should evaluate the following components:
Macronutrients
Cannabis plants require large amounts of the three primary macronutrients:
-
Nitrogen (N): Vital for vegetative growth, leaf development, and chlorophyll production.
-
Phosphorus (P): Crucial for root development, flowering, and overall energy transfer.
-
Potassium (K): Supports water uptake, disease resistance, and strong stems.
Secondary macronutrients include:
-
Calcium (Ca): Important for cell wall strength and root health.
-
Magnesium (Mg): Central component of chlorophyll.
-
Sulfur (S): Helps produce amino acids and enzymes.
Micronutrients
Though required in smaller quantities, micronutrients are equally important:
-
Iron (Fe)
-
Manganese (Mn)
-
Zinc (Zn)
-
Copper (Cu)
-
Boron (B)
-
Molybdenum (Mo)
-
Chlorine (Cl)
Micronutrient deficiencies often mimic macronutrient issues, so identifying imbalances through testing is key.
pH Levels
Soil pH affects the plant’s ability to absorb nutrients. For cannabis, a slightly acidic pH between 6.0 and 6.8 is ideal. Outside this range, certain nutrients become unavailable, even if they are present in the soil.
Organic Matter
Organic matter influences nutrient availability, water retention, and microbial activity. Higher organic content typically means more biodiversity and better nutrient cycling.
Cation Exchange Capacity (CEC)
CEC measures the soil’s ability to retain and exchange positively charged nutrients (cations) like calcium, magnesium, and potassium. A higher CEC usually indicates better nutrient-holding capacity.
When To Test Cannabis Soil
Cannabis growers should test their soil:
-
Before planting: To establish a nutrient and pH baseline.
-
Mid-grow (veg or early flower): To make timely nutrient adjustments.
-
After harvest: To evaluate soil health and prepare for the next cycle.
For perennial outdoor grows or living soil beds, testing once or twice a year is recommended. For container-based indoor systems, testing before each new cycle is ideal.
Types of Soil Tests
Not all soil tests are the same. Here are the most common methods used in cannabis cultivation.
Laboratory Soil Analysis
Professional labs provide the most accurate and comprehensive results. Growers can send soil samples to a lab that specializes in agricultural or horticultural testing. These labs measure nutrient levels, pH, organic matter, microbial life, and more.
Pros:
-
Highly accurate
-
Extensive data
-
Micronutrient and trace mineral readings
Cons:
-
Costly ($50 to $150 per test)
-
Slower turnaround (1 to 2 weeks)
DIY Soil Test Kits
Available at garden centers or online, these kits allow growers to test pH and primary nutrients at home.
Pros:
-
Affordable
-
Immediate results
Cons:
-
Less accurate
-
Limited scope (usually N-P-K and pH only)
pH Meters and Probes
Handheld digital meters test the soil’s pH and electrical conductivity (EC). Some advanced probes also measure temperature and moisture.
Pros:
-
Fast
-
Easy to use
Cons:
-
Not comprehensive
-
Requires calibration
How To Collect a Soil Sample
Proper sample collection is essential for accurate test results. Here’s how to do it:
-
Use clean tools. Avoid metal tools that could contaminate the sample.
-
Dig 6 to 8 inches deep. For cannabis, this captures the active root zone.
-
Take multiple samples. Collect from 4 to 6 spots across the grow area.
-
Mix the soil together. Combine samples in a clean container to create a composite sample.
-
Air-dry if needed. Some labs require the soil to be dry.
-
Follow submission instructions. Use the lab’s labeled bag or kit.
Interpreting Soil Test Results
Once your results come back, it’s time to interpret the numbers. Labs will usually provide nutrient levels in parts per million (ppm) or pounds per acre, along with recommendations. Here’s how to understand the key metrics.
Macronutrient Ranges (General Guidelines)
-
Nitrogen (N): 40 to 80 ppm
-
Phosphorus (P): 20 to 50 ppm
-
Potassium (K): 150 to 250 ppm
-
Calcium (Ca): 1,000 to 2,000 ppm
-
Magnesium (Mg): 150 to 250 ppm
-
Sulfur (S): 50 to 100 ppm
pH
-
Ideal range: 6.0 to 6.8
-
Too low (< 5.5): Acidic, leading to micronutrient toxicity
-
Too high (> 7.0): Alkaline, causing nutrient lockouts
CEC and Base Saturation
-
High CEC (15+): Holds nutrients well but may drain slowly
-
Base saturation: Ideal levels are 65 to 75% calcium, 10 to 20% magnesium, and 3 to 5% potassium
Organic Matter
-
Ideal range: 5 to 10%
-
Too low: Poor moisture retention and nutrient cycling
-
Too high (>15%): May tie up nitrogen and harbor pests
Amending Soil Based on Test Results
After analyzing the report, growers can create a customized soil amendment plan. Here are some common solutions:
To Raise pH
-
Dolomitic lime (adds calcium and magnesium)
-
Wood ash (adds potassium and raises pH)
-
Crushed oyster shells
To Lower pH
-
Elemental sulfur
-
Peat moss
-
Citric acid or vinegar (short-term fixes)
To Increase Nitrogen
-
Blood meal
-
Feather meal
-
Fish emulsion
-
Composted manure
To Increase Phosphorus
-
Bone meal
-
Bat guano (high-phosphorus varieties)
-
Rock phosphate
To Increase Potassium
-
Kelp meal
-
Wood ash
-
Greensand
To Add Micronutrients
-
Chelated mixes (for iron, zinc, manganese)
-
Compost teas
-
Humic and fulvic acids (boost uptake of micronutrients)
To Boost Organic Matter
-
Compost
-
Worm castings
-
Biochar
Soil Testing for Indoor vs. Outdoor Cannabis Grows
The principles of soil testing remain the same across indoor and outdoor grow types, but the strategies may differ.
Indoor Grows
-
Usually rely on bagged soil or coco blends
-
Smaller containers mean less nutrient retention
-
Testing should be done before each grow cycle
-
pH and EC testing is more frequent and often automated
Outdoor Grows
-
Require full lab tests for comprehensive planning
-
Native soils vary in quality and need amending
-
Long-season crops make nutrient balance even more important
-
Microbial and fungal life can be manipulated for long-term gains
Living Soil and No-Till Growing
Soil testing is especially important for regenerative practices like living soil and no-till. These methods rely on soil food web dynamics, microbial synergy, and organic amendments to cycle nutrients naturally.
In living soil systems:
-
Frequent testing helps avoid imbalances that accumulate over time.
-
Fungal-to-bacterial ratios are crucial and can be tested using microscopy.
-
Top-dressing and cover cropping replace liquid fertilizers.
By keeping the soil in balance, growers can create a closed-loop system that produces exceptional cannabis sustainably.
Common Soil Testing Mistakes
Avoid these pitfalls when testing soil for cannabis cultivation:
-
Taking shallow samples: Only testing the surface misses root zone conditions.
-
Testing too late: Results won’t help if flowering has already started.
-
Ignoring micronutrients: These elements are often the missing link in health problems.
-
Applying amendments blindly: Always base changes on hard data, not guesswork.
-
Skipping retesting: Soil health changes over time. Always verify after major amendments.
Final Thoughts on Soil Testing for Cannabis
Soil testing for cannabis is not just a tool for troubleshooting—it’s a proactive approach to achieving the best possible grow outcomes. By investing in accurate testing and understanding how to interpret and act on the results, cultivators can ensure their plants receive the exact nutrients they need at every stage of life.
Whether you grow indoors in containers or outdoors in native soil, testing allows you to unlock the full potential of your cannabis crop. It reduces risk, saves money, and maximizes quality—especially in terms of terpene expression, potency, and yield.
In short, soil testing takes the guesswork out of cannabis cultivation. It’s the cornerstone of science-based growing, empowering growers to work with nature instead of against it.
Suggested Articles
;)
;)
;)


 16 Jan 2026
  7 min read


 August 07, 2025


RESPONSES (0)
No responses yet. Be the first to respond!