Troubleshooting Common Issues During the Germination Process

Germinating seeds can be a tricky process, and even the most experienced gardeners can run into issues. But fear not, dear reader! With a little troubleshooting, you can get your seedlings off to a flying start. In this article, we’ll provide some expert tips on troubleshooting common issues during seed germination.
Key Takeaways:
- Germinating seeds can be challenging, but many issues can be resolved with some troubleshooting.
- Common issues during germination include poor seed quality, improper storage, watering mistakes, temperature and humidity fluctuations, soil and growing medium issues, light exposure problems, delayed or prolonged germination, and nutrient deficiencies.
- By understanding the importance of seed quality, proper storage techniques, watering and temperature management, seed depth and planting techniques, pest and disease management, and nutritional requirements, you can troubleshoot and resolve most germination issues.
Understanding Seed Quality
Let’s face it, no one wants to waste their time planting seeds that won’t even bother to show up. That’s why understanding seed quality is crucial for successful germination.
“A seed is a promise, waiting to be kept.” – Anonymous
Quality seeds are those that have been harvested from healthy, well-developed plants and are free from diseases, pests, and defects. Poor-quality seeds, on the other hand, may have low viability or vigor, or may be contaminated with diseases or pests.
Seeds with low viability have a low chance of germinating, while seeds with low vigor may germinate but produce weak, stunted seedlings that struggle to thrive. Furthermore, seeds contaminated with diseases or pests may not germinate at all or may produce weak, diseased seedlings.
So, before you start planting, make sure to carefully inspect your seeds, and only use those that are of good quality and free from defects.
Proper Seed Storage
Let’s talk about the importance of proper seed storage. You can’t just toss your seeds into any old container and expect them to thrive. Improper storage can lead to germination issues and leave you scratching your head wondering where you went wrong. Here are some tips for storing your seeds correctly:
| Storage Method | Best Temperature Range | Container Type |
|---|---|---|
| Refrigeration | 32-41°F (0-5°C) | Airtight container with desiccant packet |
| Freezing | 0°F (-18°C) | Airtight container with desiccant packet |
| Room Temperature | 60-70°F (15-21°C) | Airtight container with desiccant packet |
Desiccants are a must when storing seeds to prevent moisture from getting in and causing mold or fungal growth. You can use silica gel packets (the kind that come in shoeboxes) or purchase desiccant packs online. Just make sure the container is airtight to keep moisture out.
Now that you know how to store your seeds properly, you’ll be one step closer to ensuring successful germination. Don’t let poor storage ruin your chances of growing those gorgeous plants you’ve been dreaming of.
Watering Mistakes
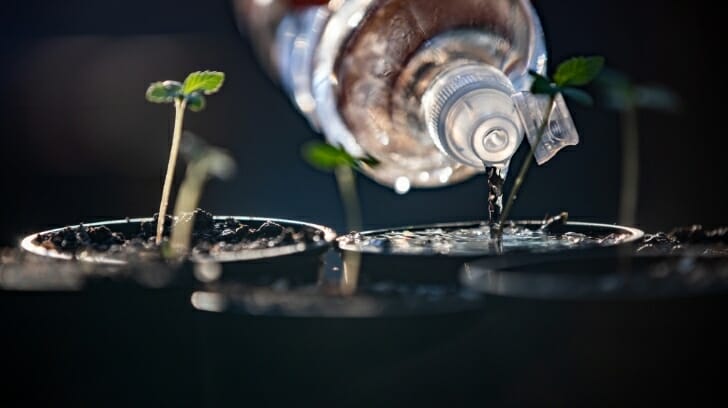
Watering your plants is like walking a tightrope; too much or too little can lead to disastrous results. Here are some of the most common watering mistakes to avoid during the germination process:
| Mistake | Consequence | Troubleshooting |
|---|---|---|
| Overwatering | Drowning the seeds or causing disease | Only water when the soil is dry to the touch and provide proper drainage. |
| Underwatering | Stunting growth or drying out the seeds | Check soil moisture regularly and water when needed, but don’t let the soil stay soggy. |
Remember, watering is a delicate balance. Use your instincts and trust the soil – it will tell you when it needs a drink.

Temperature and Humidity Control
Germinating seeds can be a bit like Goldilocks trying to find the perfect bed – not too hot, not too cold, not too wet, not too dry. Temperature and humidity are two key factors that need to be just right for successful germination.
If the temperature is too low, seeds won’t germinate. If it’s too high, the seeds will dry out and die. Similarly, if the humidity is too low, the seeds will dry out, but if it’s too high, they’ll rot. It’s all about balance, and finding that sweet spot is key to ensuring your seeds have the best chance of success.
How to Maintain Optimal Conditions
So, how do you control temperature and humidity during germination? Here are some tips:
- Use a thermometer to monitor the temperature. You can buy special germination mats that sit under your trays to provide consistent heat, or you can use a warm spot in your home, such as on top of the fridge or near a radiator.
- Keep your seeds moist but not soaked. You can use a spray bottle to mist the soil, or cover your trays with plastic wrap to maintain humidity.
- If you’re struggling to maintain the right level of humidity, you can try using a humidifier or placing a bowl of water near your seedlings.
- Keep an eye on the weather. If you’re starting your seeds outside, make sure the temperature isn’t going to drop too low overnight.
Remember, every seed is different, so you may need to experiment a little to find the perfect temperature and humidity levels for your chosen plant. But with a little trial and error, you’ll soon be a germination pro!
Soil and Growing Medium Issues
As much as they try, seeds can’t control where they’re planted. That job falls to us, the gardeners. Unfortunately, sometimes we don’t quite get it right. Here are some common soil and growing medium issues that can cause germination problems and what you can do to fix them.
| Problem | Solution |
|---|---|
| Poor drainage | Make sure your soil or medium has adequate drainage. You can add perlite or vermiculite to improve drainage. If planting in the ground, create a raised bed to ensure proper drainage. |
| Nutrient deficiencies | Test your soil to determine any nutrient deficiencies and address them accordingly. You can also add compost or fertilizers to improve soil fertility. |
| Incorrect pH | Check the pH of your soil or medium. Seeds prefer a slightly acidic to neutral pH range. If the pH is too acidic or alkaline, adjust it accordingly. |
Remember, the soil or medium is the foundation for your plants’ growth. Give them a good start by ensuring the conditions are optimal.
Light Exposure Problems
When it comes to successful seed germination, light exposure is a critical factor. Seedlings require adequate light to grow and develop properly, but too much or too little can cause issues.
Overexposure to light can cause seedlings to dry out and become stunted, while insufficient light can lead to weak, spindly plants. If you’re experiencing issues with light exposure during germination, there are a few things you can try:
- Adjust light intensity: If your seedlings are receiving too much light, try reducing the intensity or moving the light source farther away. Conversely, if they’re not getting enough light, try increasing the intensity or moving the light closer.
- Increase light duration: If you’re using artificial lighting, consider extending the length of time the seedlings are exposed to the light each day.
- Improve natural lighting: If possible, move your seedlings to a location with better natural lighting. South-facing windows are an excellent choice, but be sure to avoid exposing them to direct sunlight, as this can be too intense for young seedlings.
Remember, balance is key when it comes to light exposure during germination. By making small adjustments to your light sources and timing, you can help ensure your seedlings get the light they need to thrive.
Seed Depth and Planting Techniques
Let’s talk about the importance of proper seed depth and planting techniques. It’s easy to get carried away with the excitement of planting and end up burying your seeds too deep. But fear not, we have some troubleshooting tips for addressing this issue!
- Check the packaging: Make sure you’re following the recommended seed depth on the packaging. It’s there for a reason, folks!
- Too deep: If you’ve accidentally buried your seeds too deep, gently unearth them with a fork and replant them at the correct depth.
- Too shallow: If your seeds are too shallow, gently press them down with your finger or a tool to ensure they have proper soil contact.
- Spacing: Remember to give your seeds enough space to grow properly. Overcrowding can lead to stunted growth and disease.
Proper planting techniques are just as important for successful germination. Here are some tips:
- Prepare your soil: Make sure your soil is loose and well-draining before planting.
- Water first: Water your soil before planting to ensure your seeds have a moist environment to grow in.
- Patience is a virtue: Don’t rush the process! Wait until your soil has warmed up enough before planting. Planting too early can result in poor germination rates.
Pest and Disease Management
Congratulations, you’ve successfully germinated your seeds! But wait, what’s that? Are those tiny bugs crawling all over your seedlings? Is that a strange mold growing on your soil? Don’t panic, let’s dive into some pest and disease management tips to save your seedlings from destruction.
Identifying the Culprits
The first step to managing pests and diseases is to identify what you’re dealing with. Take a close look at your seedlings and the surrounding soil. Look for signs of insects, such as aphids or spider mites, or fungal growth, like powdery mildew or damping off.
If you’re not sure what you’re seeing, take a quick snapshot and post it to a gardening forum for identification. There are plenty of knowledgeable gardeners out there happy to help.
Organic Solutions
If you’re growing your seedlings organically, you’ll want to opt for organic pest and disease management solutions. A common method is to use insecticidal soaps or oils, which can be sprayed directly onto the affected areas.
Another option is to introduce beneficial insects, such as ladybugs or lacewings, to your growing area. These insects will feast on any pesky bugs and help keep your seedlings healthy.
Chemical Solutions
If you’re not growing organically, you may prefer to use chemical solutions to manage pests and diseases. Just be sure to read the labels carefully and use them as directed.
Chemical pesticides and fungicides can be effective, but they can also harm beneficial insects and even your seedlings if not used properly. Always follow the manufacturer’s instructions and wear protective gear when applying.
Remember, prevention is the best medicine when it comes to pests and diseases. Keep your growing area clean and free of debris, and monitor your seedlings regularly to catch any issues early on.
Timeframe Considerations
Patience is a virtue, especially when it comes to seed germination. Unfortunately, some gardeners may find themselves growing impatient when their seeds don’t sprout as quickly as they hoped.
If you’re experiencing delayed germination, don’t panic. Keep in mind that different species have different time requirements for successful germination. Some seeds can take several weeks to sprout, while others may take even longer.
If you’re worried that your seeds are taking too long, be sure to double-check the estimated germination time for your specific plant species. This information can typically be found on the seed packet or by consulting a reputable gardening resource.
If you’re still not seeing any signs of sprouting after the estimated germination time has passed, there may be an underlying issue inhibiting germination. This could be related to poor seed quality, improper storage, or other factors.
Remember, successful gardening requires patience, persistence, and a willingness to troubleshoot issues as they arise. With a little bit of TLC and some troubleshooting know-how, you’ll be well on your way to bountiful garden harvests!
Nutritional Requirements
Just like us humans, seeds also have specific nutritional requirements to grow big and strong. Nutrient deficiencies can lead to stunted growth, yellowing leaves, and ultimately, germination failure.
So how can you ensure your seedlings are getting the nutrients they need? Well, it all starts with the soil. Make sure your soil is rich in organic matter and has a good balance of nutrients. If you’re using synthetic fertilizer, be sure to follow the package instructions carefully.
Another way to provide your seedlings with the nutrients they need is by using a nutrient-rich growing medium. This can be in the form of compost, worm castings, or a commercial potting mix designed for seedlings.
Soil Testing
If you’re not sure whether your soil is providing your seedlings with the nutrients they need, you can always have it tested. Soil testing kits are readily available at your local garden center or online. Just be sure to follow the instructions carefully and send the sample to a reputable lab.
Once you know what nutrients your soil is lacking, you can amend it accordingly. For example, if your soil is low in nitrogen, you can add blood meal or fish emulsion to boost nitrogen levels.
Overfeeding
While it’s important to ensure your seedlings are getting the nutrients they need, it’s also important not to overfeed them. Overfeeding can lead to nutrient burn and even death. Always follow package instructions when using fertilizers and be cautious when using supplements.
With the right soil, growing medium, and nutrients, your seedlings should be well on their way to healthy growth and successful germination.
Troubleshooting Common Issues During Seed Germination: Conclusion
Well, folks, we’ve reached the end of our troubleshooting journey through the germination process. You now know how to handle seed quality issues, improper soil and growing mediums, temperature and humidity fluctuations, pests and diseases, and all the other headaches that can impede successful germination.
But Wait, There’s More!
Don’t forget about the importance of proper seed storage, watering techniques, and nutritional requirements. And let’s not overlook the all-too-important light exposure and seed planting techniques.
Germination can be a finicky process, but with the right mindset and troubleshooting tips, you can help your seeds turn into thriving, radiant plants.
The Seeds of Knowledge Have Been Sown
So go forth, budding gardeners, and put your newfound knowledge into action. Don’t be afraid to experiment a bit, and remember that even experienced growers run into issues from time to time. Keep troubleshooting and stay curious. Who knows what kind of green thumb you might develop!
FAQ
Q: What are some common issues that may arise during the germination process?
A: Troubleshooting common issues during the germination process is crucial for successful seedling growth. Some common problems include seedlings failing to sprout, slow or uneven germination, and seed rot.
Q: How can I troubleshoot germination issues related to seed quality?
A: Understanding seed quality is essential for successful germination. Common problems that can occur due to poor seed quality include low germination rates and weak seedlings. It’s important to source high-quality seeds from reputable suppliers.
Q: What should I know about proper seed storage to avoid germination issues?
A: Proper seed storage is crucial for maintaining seed viability. Improper storage can lead to issues such as seed dormancy, mold growth, or decreased germination rates. Store seeds in a cool, dry place in airtight containers.
Q: What are some common watering mistakes that can affect seed germination?
A: Watering mistakes can have a significant impact on seed germination. Overwatering can lead to seed rot, while underwatering can cause seedlings to dry out. It’s important to strike a balance and provide adequate moisture without waterlogging the soil.
Q: How does temperature and humidity control affect seed germination?
A: Temperature and humidity control are critical factors in seed germination. Fluctuations in these conditions can result in poor germination rates. It’s important to maintain optimal levels, providing consistent warmth and moisture for successful germination.
Q: What are some soil and growing medium issues that can affect germination?
A: Soil and growing medium issues can hinder seed germination. Problems like poor drainage or nutrient deficiencies can impede seedling growth. It’s essential to address these issues by improving soil quality or choosing suitable growing mediums.
Q: How does light exposure impact seed germination?
A: Proper light exposure is crucial for successful seed germination. Inadequate or excessive light can lead to weak seedlings or poor germination rates. Ensure that seedlings receive the right amount of light for optimal growth.
Q: Why is seed depth and planting technique important for successful germination?
A: Seed depth and proper planting techniques play a vital role in seed germination. Planting seeds too deep or too shallow can result in poor germination rates. It’s crucial to follow recommended seed depth guidelines and provide suitable soil contact.
Q: How can I manage pests and diseases during the germination process?
A: Pests and diseases can pose challenges to seed germination. It’s essential to identify and address any issues promptly. Implement preventive measures, such as using sterilized tools and maintaining cleanliness, to minimize the risk of infestations or infections.
Q: What should I consider regarding the timeframe during the germination process?
A: Timeframe considerations are important when troubleshooting germination issues. Delayed or prolonged germination may indicate underlying problems. Monitor the germination process and take appropriate actions if seeds fail to sprout within the expected timeframe.
Q: How can I address germination issues related to nutritional requirements?
A: Nutritional deficiencies can hinder seed germination. Providing adequate nutrients, such as balanced fertilizers or organic matter, can help support healthy seedling growth. Monitor nutrient levels and adjust accordingly to troubleshoot any issues.
Suggested Articles
;)
;)
;)


 26 Dec 2025
  8 min read


 August 15, 2023


RESPONSES (0)
No responses yet. Be the first to respond!