


How to Transplant Cannabis: A Seedsman’s Complete Guide
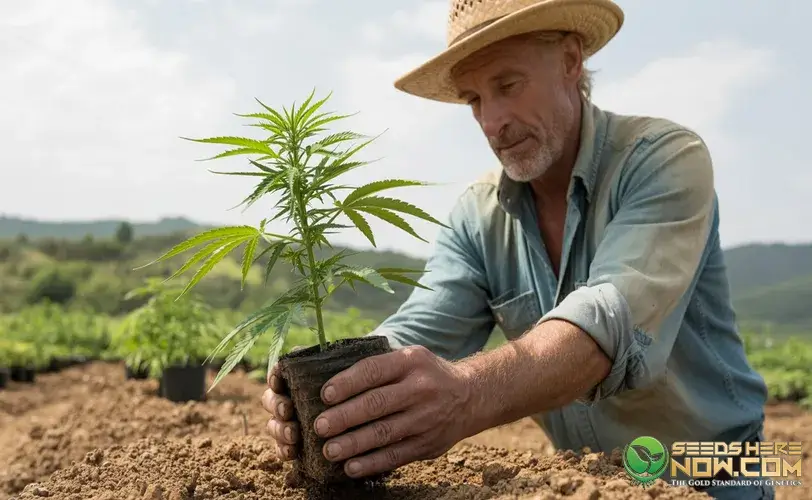
Transplanting is one of those jobs that looks trivial and quietly wrecks more grows than people admit. Move a plant at the wrong time, into the wrong pot, with clumsy hands, and you’ll stall it for a week or drown the roots outright. Do it right and the plant never even notices — it just explodes with new growth a few days later.
I’ve potted up more plants over 16 years than I can count. Here’s exactly how I do it, when I do it, and the mistakes I watch beginners make over and over.
What Transplanting Is and Why You Bother
Transplanting is moving a plant from a smaller container into a bigger one as it grows. That’s it. But the reason you do it matters, because it tells you how to do it right.
Cannabis roots grow to fill their container. Once they hit the walls, they start circling and the plant becomes root-bound — a dense, choked knot of roots with nowhere to go. A root-bound plant stops drinking properly, shows nutrient deficiencies for no obvious reason, dries out fast between waterings, and slows its top growth to a crawl. Potting up gives the roots fresh room to expand, and a plant with a big healthy root system is a plant with big healthy buds. Roots first, everything else follows.
So why not just start every seed in a giant pot and skip the whole process? Because a small plant in a huge pot is a recipe for overwatering. A tiny root system can’t drink the water held by a big volume of soil, so that soil stays soggy for days, the roots sit in a swamp, and you get root rot or damping off. Matching pot size to plant size keeps the soil cycling between wet and dry the way roots want. That’s the real reason we pot up in stages instead of one big jump.
When to Transplant
Timing is the whole game. Here’s what I watch for.
First transplant (out of the seedling cup): Move up when the seedling has 3 to 4 sets of true leaves and stands a few inches tall, or when you see roots just starting to peek out the drainage holes of your starter cup. The plant should be clearly outgrowing its container but not yet strangled by it.
Later transplants: The universal signal is roots emerging from the drainage holes. Tip the pot, look at the bottom. White root tips poking out means the plant is ready for more room. Another tell: the plant dries out faster and faster between waterings — that’s roots filling the pot and drinking everything.
The one hard rule: don’t transplant in flower. Get your final transplant done before you flip to 12/12, or within the first week or so of the stretch at the very latest. Once a plant commits to flowering it’s pouring everything into bud production, and root disturbance at that stage is pure stress with no upside. Size up in veg. Finish the job before flower.
Most photoperiod plants go through 1 to 2 transplants in a normal grow: seedling cup, maybe a solo intermediate pot, then final container. You don’t need six stages. Two well-timed moves beat five stressful ones.
Pot Size Progression
The rule of thumb: each new pot should be roughly double the volume of the last. Bigger than double invites overwatering; much smaller than double means you’re transplanting again in no time. Here’s the progression I use as a rough guide:
| Stage | Plant size | Container |
|---|---|---|
| Seedling | Sprout to a few inches | Solo cup / small starter pot |
| Early veg | 6-12 inches | 1-2 gallon |
| Mid veg | 12-24 inches | 3-5 gallon |
| Final / flower | 24+ inches | 5-15+ gallon |
Final pot size depends on how big you’re growing and your space. A short indoor tent plant might finish in 3-5 gallons. A big outdoor photoperiod monster wants 15, 25, even 100 gallons or straight into the ground. Match the container to the plant you intend to grow.
One tip: fabric pots (smart pots) are worth using. They air-prune the roots — when a root hits the breathable wall it stops and branches instead of circling — so you get a denser root mass and less root-bound trouble. They drain better too. I run them for most grows.
How to Transplant, Step by Step
1. Water the plant a day or so before — lightly. You want the root ball damp and cohesive, not soaking. Slightly moist soil holds together around the roots when you slide it out; bone-dry soil crumbles and rips roots, soaking-wet soil turns to mud and falls apart. Damp is the sweet spot.
2. Prep the new pot. Partly fill the bigger container with your fresh mix, leaving a hole in the center roughly the size of the current root ball. Don’t pack the soil down hard — loose soil lets roots and water move. Compacted soil chokes drainage.
3. Get the plant out gently. Spread your fingers over the top of the soil with the stem between them, tip the pot over, and support the root ball as it slides out. Squeeze the sides of a plastic pot or push up from the drainage holes to loosen it. Never yank the plant out by the stem — you’ll tear the roots from the top down. If it’s in a fabric pot, just peel the fabric away.
4. Set it in and backfill. Lower the intact root ball into the hole so the top of it sits at the same soil level it was before. Fill in around the sides with fresh mix and lightly firm it — firm enough to stand the plant up, loose enough to breathe. Don’t bury the stem deeper than it was unless you’re deliberately burying a stretched seedling.
5. Disturb the roots as little as possible. The less you handle that root ball, the faster the plant recovers. Don’t tease the roots apart unless the plant is badly root-bound and circling hard — in that case, gently loosen the outer roots so they grow outward instead of continuing to circle.
6. Water in thoroughly. After transplanting, water well to settle the soil around the root ball and eliminate air pockets. This is the one time a fresh transplant gets a full drink. A little seaweed or a mild root stimulant in that first watering helps with shock, but plain water works fine.
7. Ease off the light for a day. A freshly transplanted plant is briefly stressed. Keep it out of blasting direct light for a day or so if you can, or dim the light, and let it settle before going back to full intensity. Most plants perk up within a day or two and take off.
Transplant Shock and How to Dodge It
Transplant shock is when a plant wilts, droops, or stalls after being moved. It comes from root damage and disturbance. The good news: if you keep the root ball intact and handle it gently, you can transplant with almost zero shock. The plants that get hammered are the ones whose roots got mangled, whose soil fell apart, or that got moved bone-dry.
If a plant does droop after transplant, don’t panic and don’t overwater trying to “help.” Give it stable conditions, slightly reduced light, and a day or two. It’s recovering. Overwatering a stressed transplant is how you turn a minor stall into root rot.
Autos vs. Photos: This Changes Your Whole Approach
Here’s the part most transplant guides skip entirely, and it’s genetics-critical.
Photoperiod plants transplant like champs. They stay in veg as long as you keep the lights on 18/6, so you’ve got all the time in the world to pot up in stages and let them recover between moves. Size them up as they grow, finish before you flip to flower, done.
Autoflowers are the opposite, and this trips up a ton of growers. Autos flower on age, not light schedule — they’ll start blooming around 3 to 4 weeks no matter what — and every transplant carries a shock risk that can stall them right when they should be building. An auto that loses even a few days to transplant stress can flower early and finish small, and you never recover that lost size. Because their clock never stops, autos hate being disturbed.
So with autos, the standard advice from most experienced growers — and mine — is: plant your autoflower seed directly into its final container and leave it there. No potting up, no transplant shock, no lost days. Start the seed in the 3, 5, or 7-gallon pot it’s going to finish in. If you absolutely must transplant an auto, do it as early as possible — as a young seedling in the first week or two, when the roots are small and recovery is quick — and do it once. But the clean move is to skip transplanting autos altogether. With photos, pot up freely. With autos, one pot, cradle to grave.
Not sure which type you’re growing? Sort it before you plant — autoflower vs. feminized seeds explains the difference and why it changes everything downstream.
FAQ
How do I know when my plant needs transplanting?
Roots poking out the drainage holes and the plant drying out faster and faster between waterings. Those are your two clearest signals it’s root-bound and needs more room.
Can I transplant during flowering?
Avoid it. Get your final transplant done before you flip to flower or within the first week of the stretch. Disturbing roots in bloom is stress with no payoff and can cost you yield.
Should I water before or after transplanting?
Both, sort of. Water lightly a day before so the root ball holds together, then water in thoroughly right after transplanting to settle the soil and kill air pockets.
Do autoflowers need to be transplanted?
Ideally, no. Start autos directly in their final pot to avoid shock. If you must move one, do it as a very young seedling and only once. Their non-stop clock means lost recovery time equals lost yield.
Start With Genetics Worth Growing — Seeds Here Now
A perfect transplant can’t fix weak beans. Sixteen years in, I still hand-pick every breeder on the shelf so you start with genetics that actually reward the effort. Browse feminized, autoflower, and regular seeds at Seeds Here Now and give your grow a real foundation.
Suggested Articles

 06 Oct 2026
 16 min read


;)
;)
;)
 August 01, 2025


RESPONSES (0)
No responses yet. Be the first to respond!